New Customer?
Create your account 0
0 item(s) - 0,00 € No products
To be determined Shipping
0,00 € Tax
0,00 € Total
Prices are tax included
Quantity
Total
Product successfully added to your shopping cart
There are 0 items in your cart. There are 0 items in your cart.
Total (tax incl.)
Set the hour & timezone of your Raspberry Pi using SSH (Volumio)
Set the time on your RPI & Volumio device
Because of time zones or if you live in a country with daylight saving time you might want to change the system time of your Raspberry Pi someday. You will notice that it is impossible do to so by using only Volumio interface.
Here is a simple procedure to change the system hour anyway.
Update
If you are using a recent version of our customized images on RaspDac Mini or Evo Sabre, yo can now open the port 4150 (http://192.168.xx.xx:4150) to edit your system time zone from a micro web interface.Prerequisite :
- Your RPI/Volumio must be connected to a local network.- You need another computer (or SBC) on the same local network. It can be a x32, x86, x64 or ARM system running on Windows or UNIX. A physical keyboard is needed as well.
Walkthrough :
Download and install PuTTY
Start by downloading and installing the last version of PuTTY on your computer. This software's purpose is to access the system settings of your Raspberry Pi without touching its current software configuration.You can get PuTTY Installation file on this link. Once you are on the web page, look for the line "You can download PuTTY here", click on this link and get the file version that match your operating system.
If you are using a classic desktop computer with Windows and have no idea what version you need, take the MSI 32-bit file.
Download and install the files. When it is done, run the software.
PuTTY settings
Commencez par vérifier que votre Raspberry Pi est bien sous tension et qu'il est relié à votre réseau local. L'ordinateur opérant PuTTY doit être relié au même réseau.Before you do anything, take a minute to check that your Raspberry Pi is powered and connected to the network.
Launch PuTTY. You will find this window.
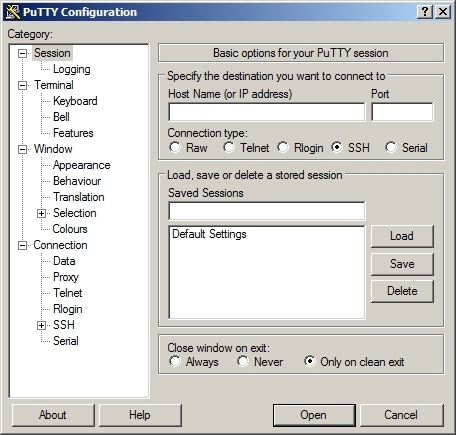
All you have to do is :
- Type volumio in the field Host Name (or IP address)
- Type 22 in the field Port
- Check SSH in the section Connection type
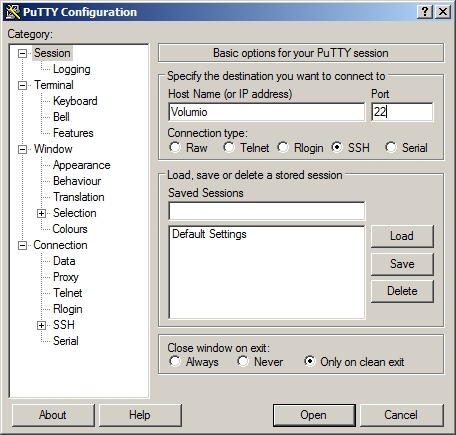
Once the three fields are filled, click on the button Open.
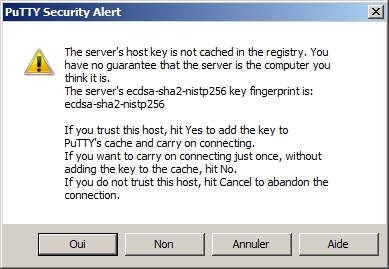
If it is the first time PuTTY runs on your computer, you may see this window. Click on Yes to store the connection information, or No to just go to the next step.
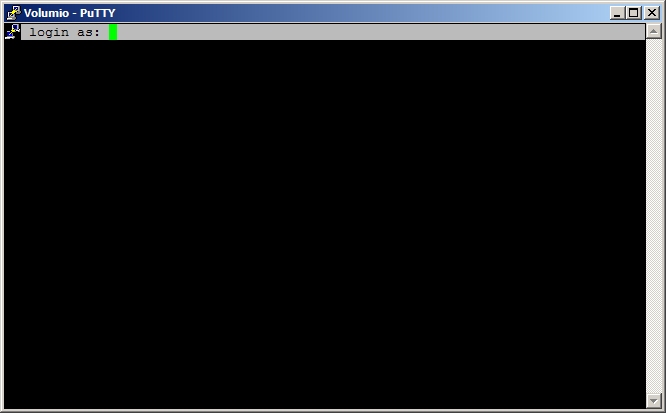
A command prompt opens and ask for a Login. Type volumio and press enter to confirm.
If you do not know how a command prompt works, it consists of a keyboard-driven interface. A mouse or a touchpad are useless and it is impossible to copy-paste : you have to type exactly the command text and be very careful of not doing any typo.
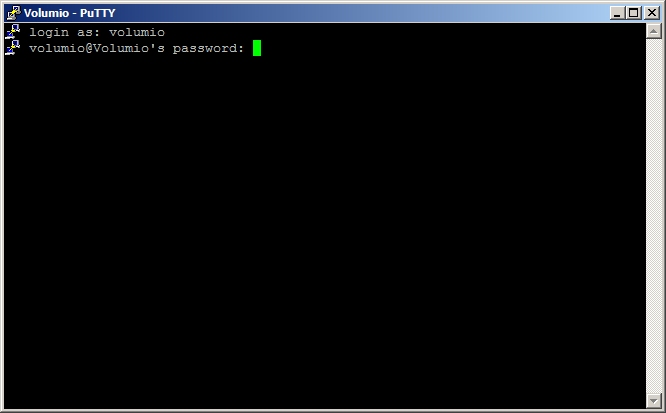
Next, the command prompt asks for a password. Just type volumio again and press enter.
Caution, when typing the password, what you type will not appear in the command prompt. You may be tempted to think the software froze, but it is just a security.
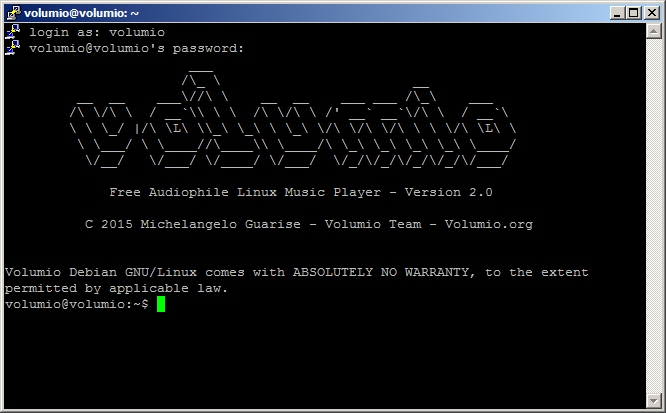
Once the login is complete, you can see Volumio written in ASCII art.
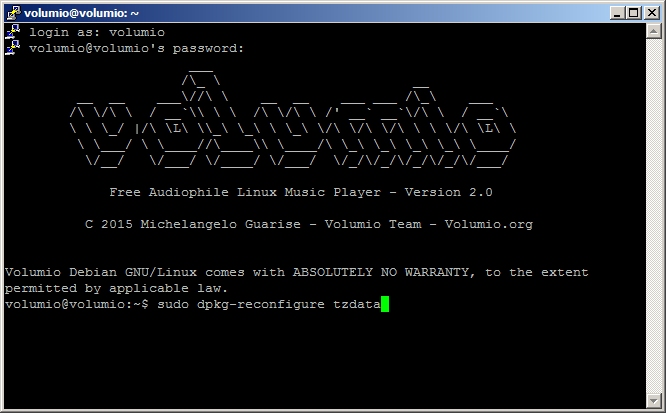
Type the command sudo dpkg-reconfigure tzdata and press enter.
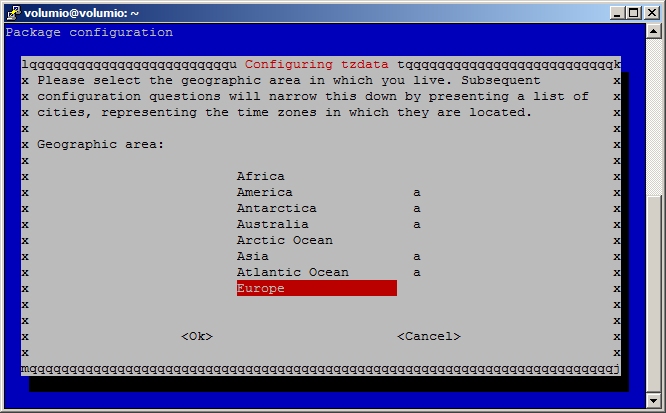
A new window open and ask to set the geographic area. Use the arrows of your keyboard to select the one that matches your area and press OK.
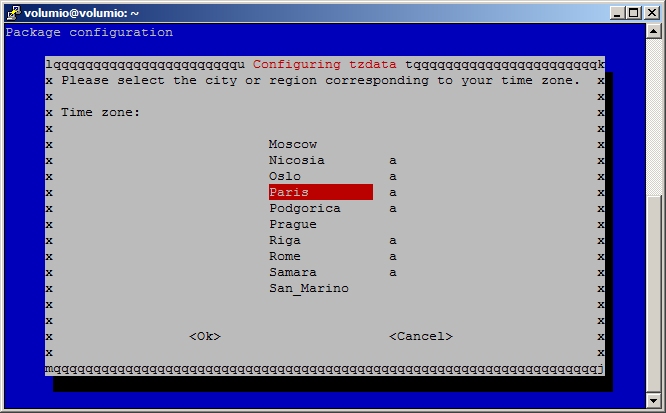
Use the arrows on your keyboard to select the city that matches your time zone and validate with OK.
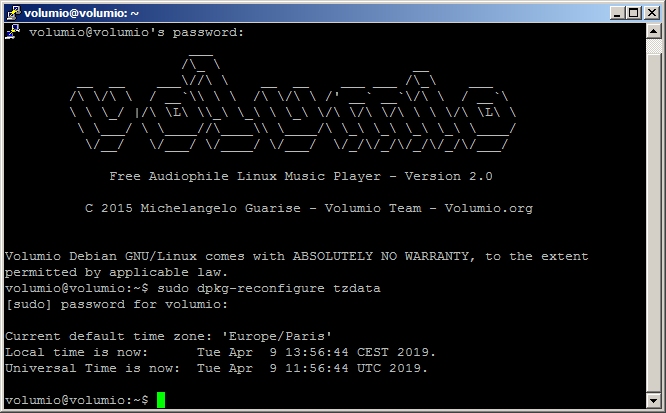
Back to the command prompt which confirms that the time zone has been set with two lines : the hour in the selected time zone and the universal time (UTC).
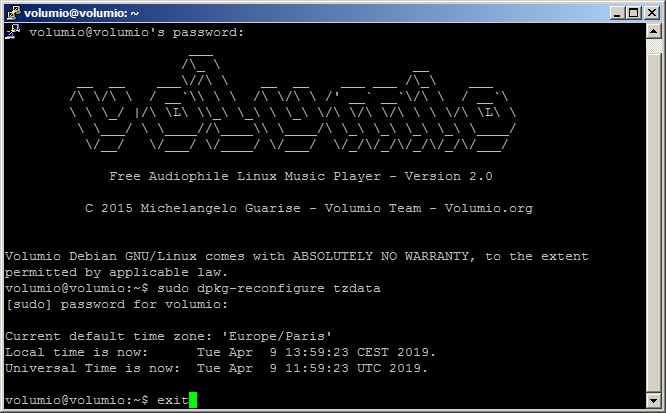
Type exit and press enter to close the command prompt. Your Raspberry Pi will now synchronize with the time zone that you selected.
Vous devez être connecté pour publier un commentaire.
Rechercher dans le blog
Blog categories
Latest Comments
Audiophonics Team
on DIY Tutorial - PiCorePlayer - Installing...Pierre Bommel
on Lecteur réseau Opensource : SolutionsPierre Bommel
on DIY Tutorial - PiCorePlayer - Installing...Audiophonics Team
on Tutorial DIY - Power cable ELECAUDIO CS-331B


2 Commentaires
Laisser un commentaireHen Dekker 2021-12-22
I there a way to make this work?
the display is going very fast to sleep, how can I change that or keep it on
I use the MINIKIT with the RPI3b
regards,
Hendrik
Laurent nicolino 2020-04-09
merci !